


Double your Mint Apple Jelly fun!
Here are my two versions of Mint Apple Jelly.
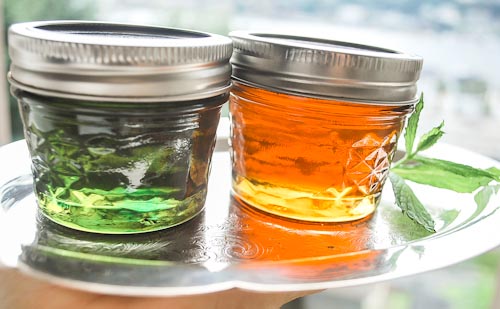
The jar on the right is for puritans. It has no food coloring.
The one on the left? I'm going to fess up and tell you right off the bat: it's not-so-pure. It had help turning green. It's for the people who once in awhile throw caution to the wind and add a couple drops of food coloring to make something look more like the stuff they remember from childhood. Food coloring is not the most evil thing in the world. It's in Red Velvet Cake and Orange Jell-O and the commercially-made Mint Apple Jelly my mom served with roast leg of lamb at Easter.
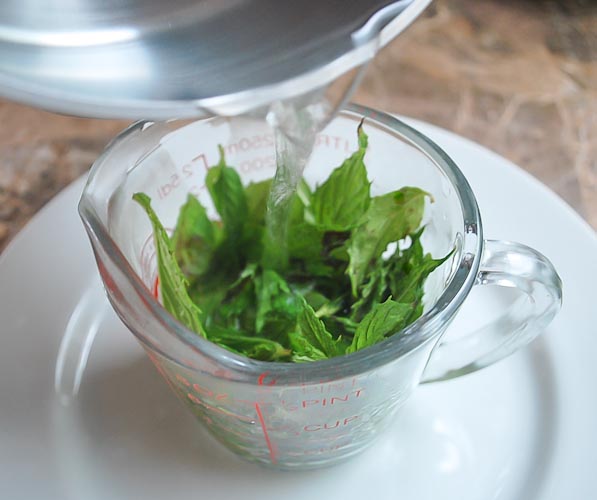
You see, one reason why mint is so beautiful when it's growing in nature is that it's still raw, but if you want to extract the flavors from this versatile herb for jelly, you're going to need to give it a bath in boiling water and that changes its appearance dramatically.
After the mint leaves sit for an hour, strain the liquid off the leaves.
This pale liquid in the jar is what you'll have left:
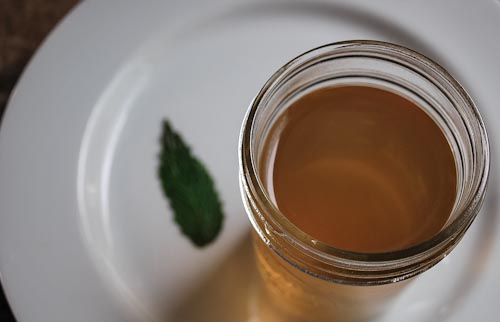
At this point, your fresh mint has been turned into a very important ingredient for your Mint Apple Jelly. And if you've changed your mind about making jelly...well...you've got a delicious glass of mint tea!
If you want to add green food coloring, it's totally up to you, of course. That's one reason why we preserve food ourselves. To make conscious choices about the ingredients we feed ourselves and our friends & families.
Honestly, I had to go out and buy food coloring for this. I'm not a big fan of artificially-colored or artificially-flavored anything. The last time I tinted something red I used beet powder. But I felt strongly about creating a true Mint Apple Jelly that was not only full of delightful fresh mint flavor, but one that reminded me of my childhood. I absolutely loved the Mint Apple Jelly my mom bought at the grocery store and I knew the only way to duplicate it was to add a bit of food coloring.
I'll let you decide which Mint Apple Jelly version to make, but every time I see that pretty green jar in my pantry, it makes me smile.
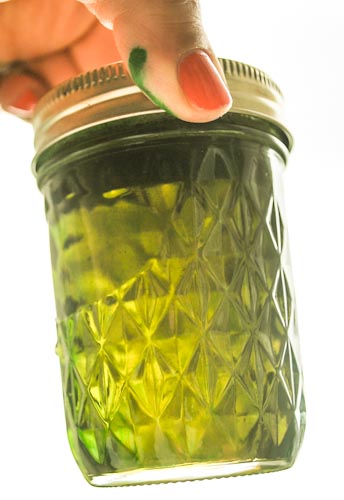 Oops...notice the tell-tale stain on my thumb.
Rest assured the food coloring incorporated better once the jar of jelly was processed!
Mint Apple Jelly
(Adapted from the Ball Blue Book Guide to Preserving)
- 1 cup firmly-packed mint leaves
- 1 cup boiling water
- 4 cups high-quality apple juice
- 2 Tablespoons bottled lemon juice
- 3 cups sugar
- Green food coloring (optional!)
Yield: 3 or 4 half pint jars
1.) Put mint leaves in a bowl and pour boiling water over the top. Stir gently, then let sit for one hour.
2.) Prepare jars by first washing them in hot soapy water then rinsing them well. Place the clean jars in a boiling water bath canner, fill it halfway with water, and place it on the stove.
3.) Turn on the heat and bring the water to a boil, then turn off the heat, but do not remove the jars from the hot water. Leave the jars in the canner until you are ready to use them.
4.) Strain mint leaves, pressing to extract the liquid.
5.) Combine mint liquid, apple juice, lemon juice, and sugar in a large heavy-bottomed saucepan.
6.) Bring to a boil over high heat, stirring to dissolve sugar.
7.) Cook to gelling point, stirring occasionally. It will probably take 20-30 minutes for the mixture to reach 220 degrees F, and it might need to cook even longer. It's best to use one or more tests to check for the proper gelling point.
8.) Remove from heat and add a few drops of green food coloring, if desired.
9.) Ladle into hot jars, leaving 1/4" headspace. Wipe rims clean with a damp paper towel. Place a seal on the jar, then screw on a band until it's finger-tip tight.
10.) Process for 10 minutes in a Boiling Water Bath.
11.) Turn kettle off and let jars rest in kettle for 5 more minutes.
12.) Remove jars carefully from kettle using jar-lifter tongs, and gently set aside to cool on the counter, on a kitchen towel, in a draft-free place.
13.) Let rest for 24 hours, then check jars for a proper seal* before storing.
14.) If jars lid seals it will easily keep for one year in a cool, dark place. If jar doesn't seal, place it in your refrigerator and eat within 3 months, and within one month after opening.
*Check lids for a proper seal by pressing down on the middle of the lid with a finger or thumb. If the lid stays down, it is sealed and will easily keep for up to one year in a cool dark place. If the lid springs up when you release your finger, the lid is not properly sealed.
 Brook Hurst Stephens
Reader Comments (5)
Ms. Stephens, I'm new to canning and tried to can peaches. I used lemon juice to kep them from turning and ligt syrup. They all floated to the top of the jar, up out of the juice. I used 1/2 inch head space. They are turning dark. Why did they float? I used the recipe from the Ball Blue Book. Deborah
Without actually being there and seeing the peaches, the syrup and whether or not you used a "hot pack" or a "cold pack" process, I feel like the best way to give you advice is to share some information, word-for-word, from the PickYourOwn.org website:
Canned fruits often will float if the sugar syrup is too heavy, if jars are packed too loosely or if air remains in the tissues of the fruit after processing. To avoid this use a light or medium sugar syrup, make sure fruit is firm and ripe and pack fruit tightly in jars without crushing.
If fruit is not covered by liquid it may darken during storage (but does not necessarily mean it is spoiled, as all fruits will darken somewhat). To avoid this be sure fruit is covered by removing air bubbles from jars liquid while still leaving the recommended head space. Also be sure to remove trapped air bubbles as described earlier.
Peaches, pears and apples may also show a blue, red or pink color change after canning. This is the result of natural chemical changes that sometimes occur as fruits are heated. It is harmless and won't affect flavor!
(Hope this helps you Deborah!)
Boy those sure look like "jewels" best use of the fancy jelly jars I have ever seen. I was wondering if you could share how your Rainier Cherry Chutney turned out and perhaps share the recipe? Thank you.
Hi ~
I just realized I don't have the Rainier Cherry Chutney recipe in my computer, which means it's still in my recipe file, hand-written on a piece of actual paper. How 20th century of me!
I do have a link to Pear Chutney here and it is basically the same thing, but you substitute (pitted) Rainier cherries for the pears.
http://www.learntopreserve.com/recipes/2010/10/14/pear-chutney.html
I hope this helps.
Mmmm....Rainier Cherry Chutney. What are you going to eat it with???
B
PS I am glad you like the jelly jars. Those little 4 ounce jars look adorable no matter what I put in them ;)
Do you need to add pectin to make sure the jelly gels?